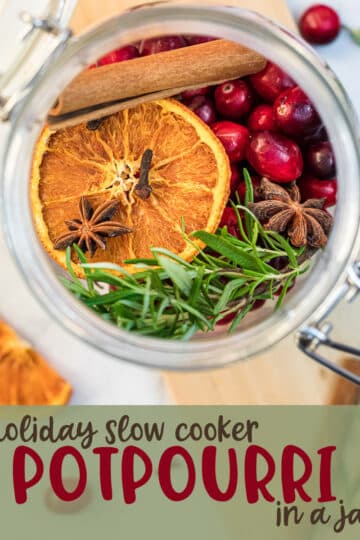
Dried orange slices are a simple two-ingredient recipe (oranges and sugar) that make a fun and festive garnish, an ingredient for potpourri, garland, and more.
You'll love this quick step by step guide to making oven-dried orange slices and it is sure to put you in the holiday mood! Use them in Holiday Potpourri!

How to dry orange slices?
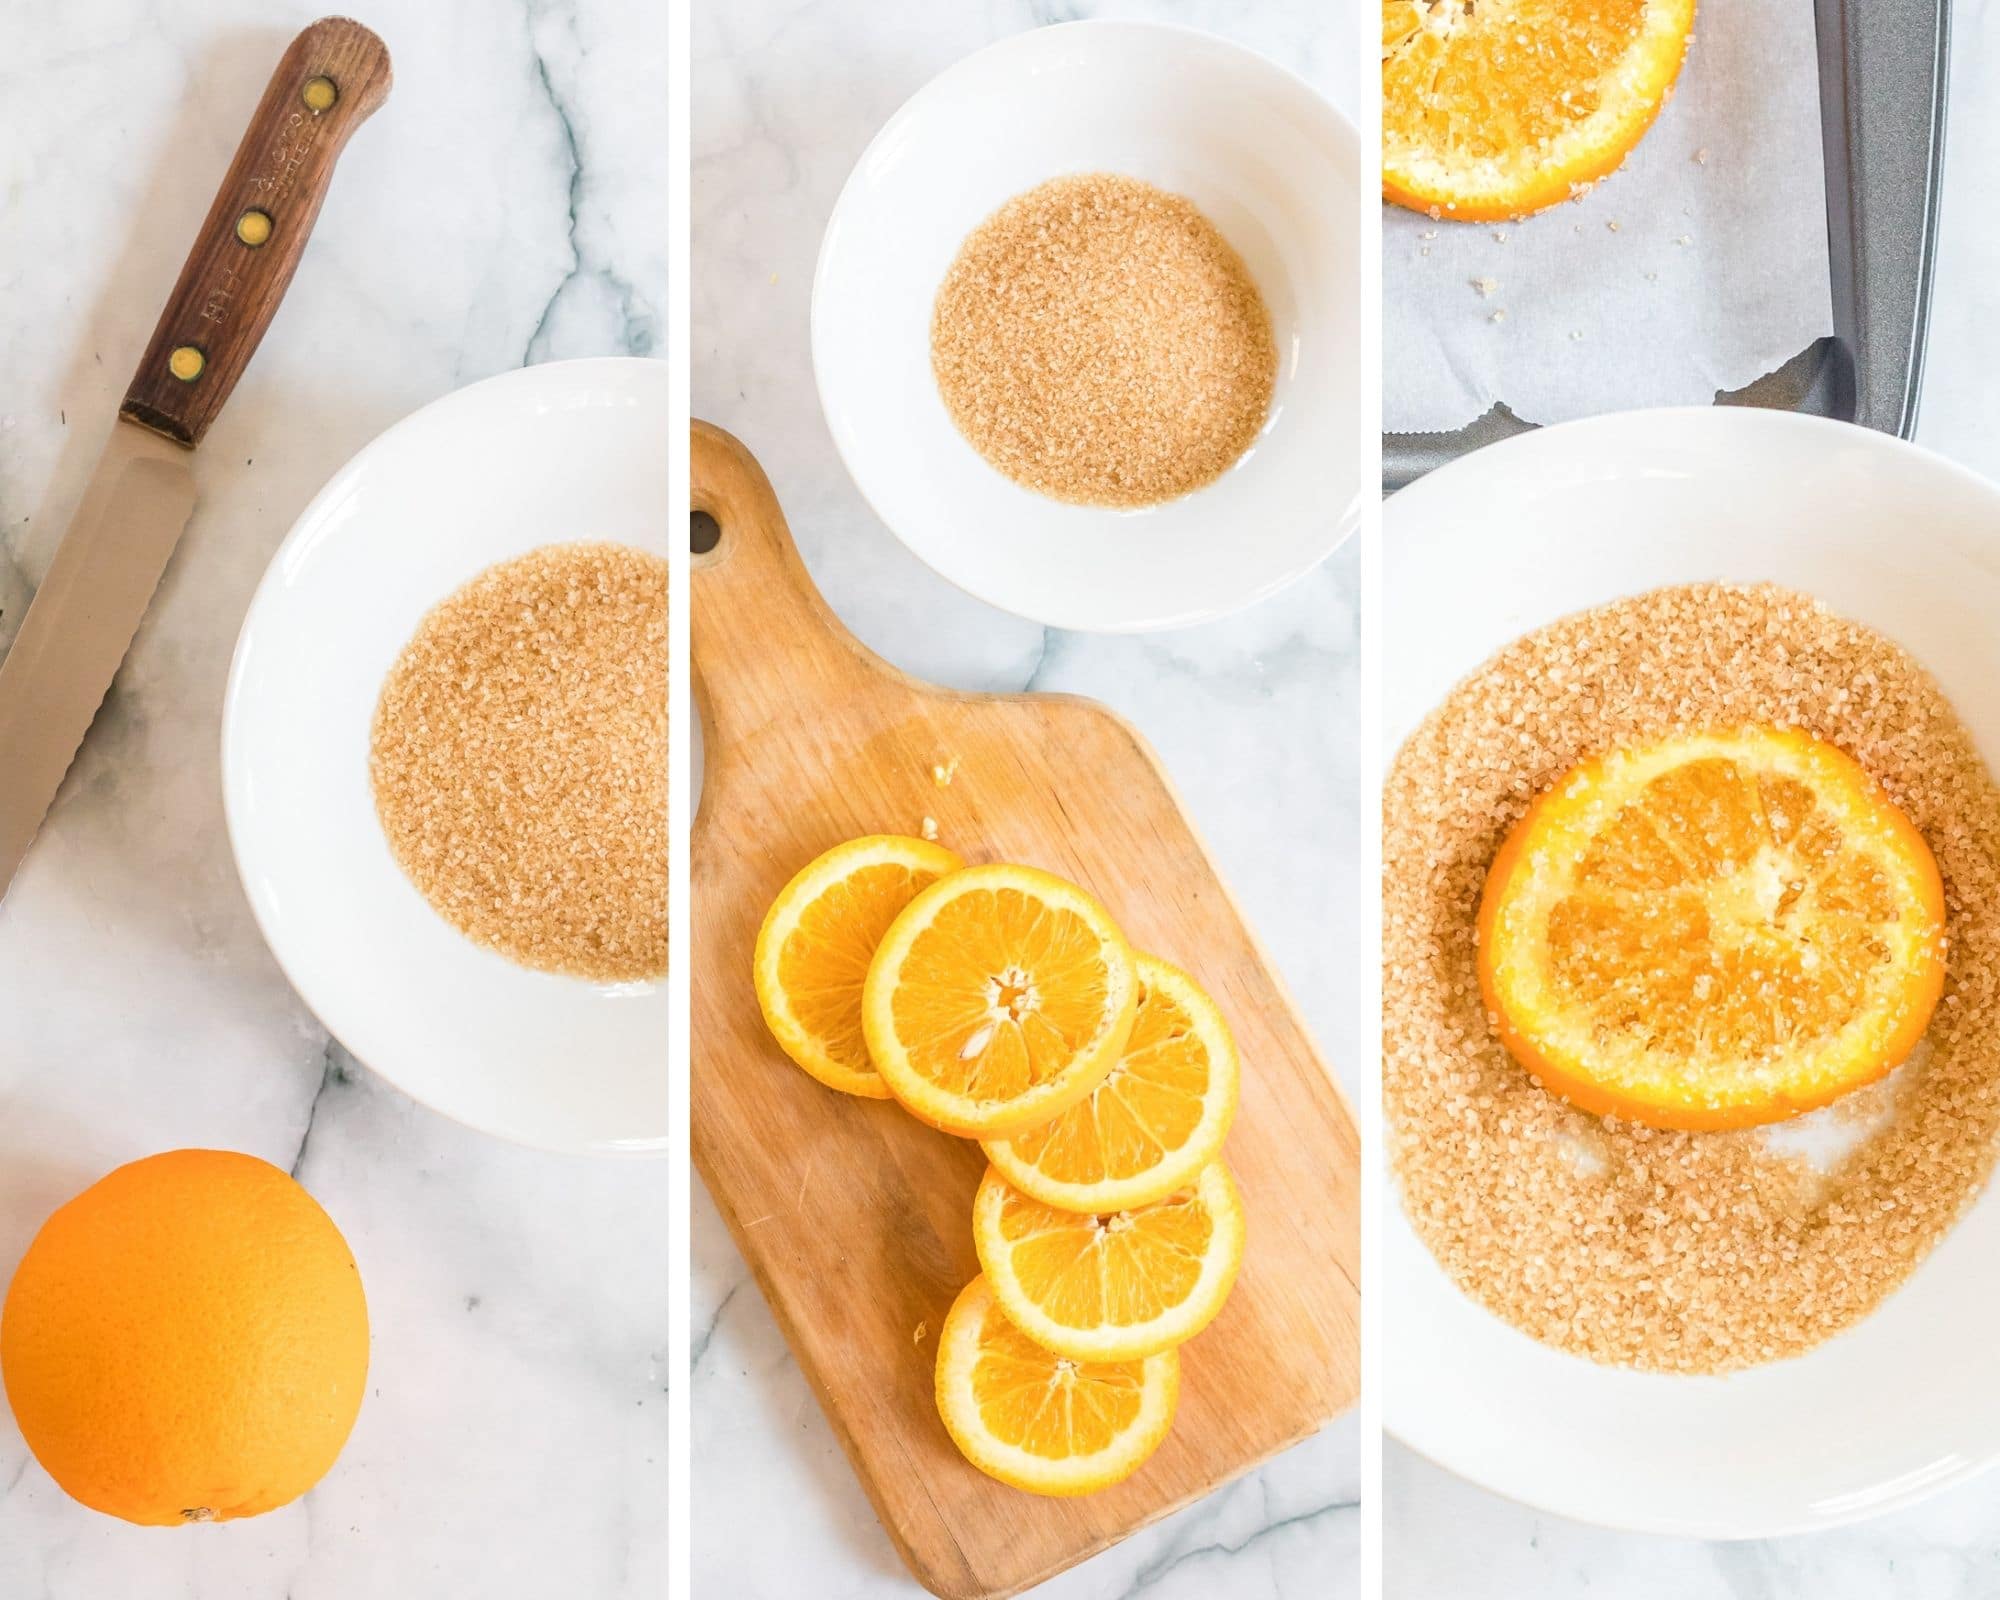
- Gather and measure the ingredients.
- Preheat the oven to 200 degrees F.
- Line a baking sheet with parchment paper.
- Slice the oranges into thin slices.
- Dip the slices in sugar - both sides.
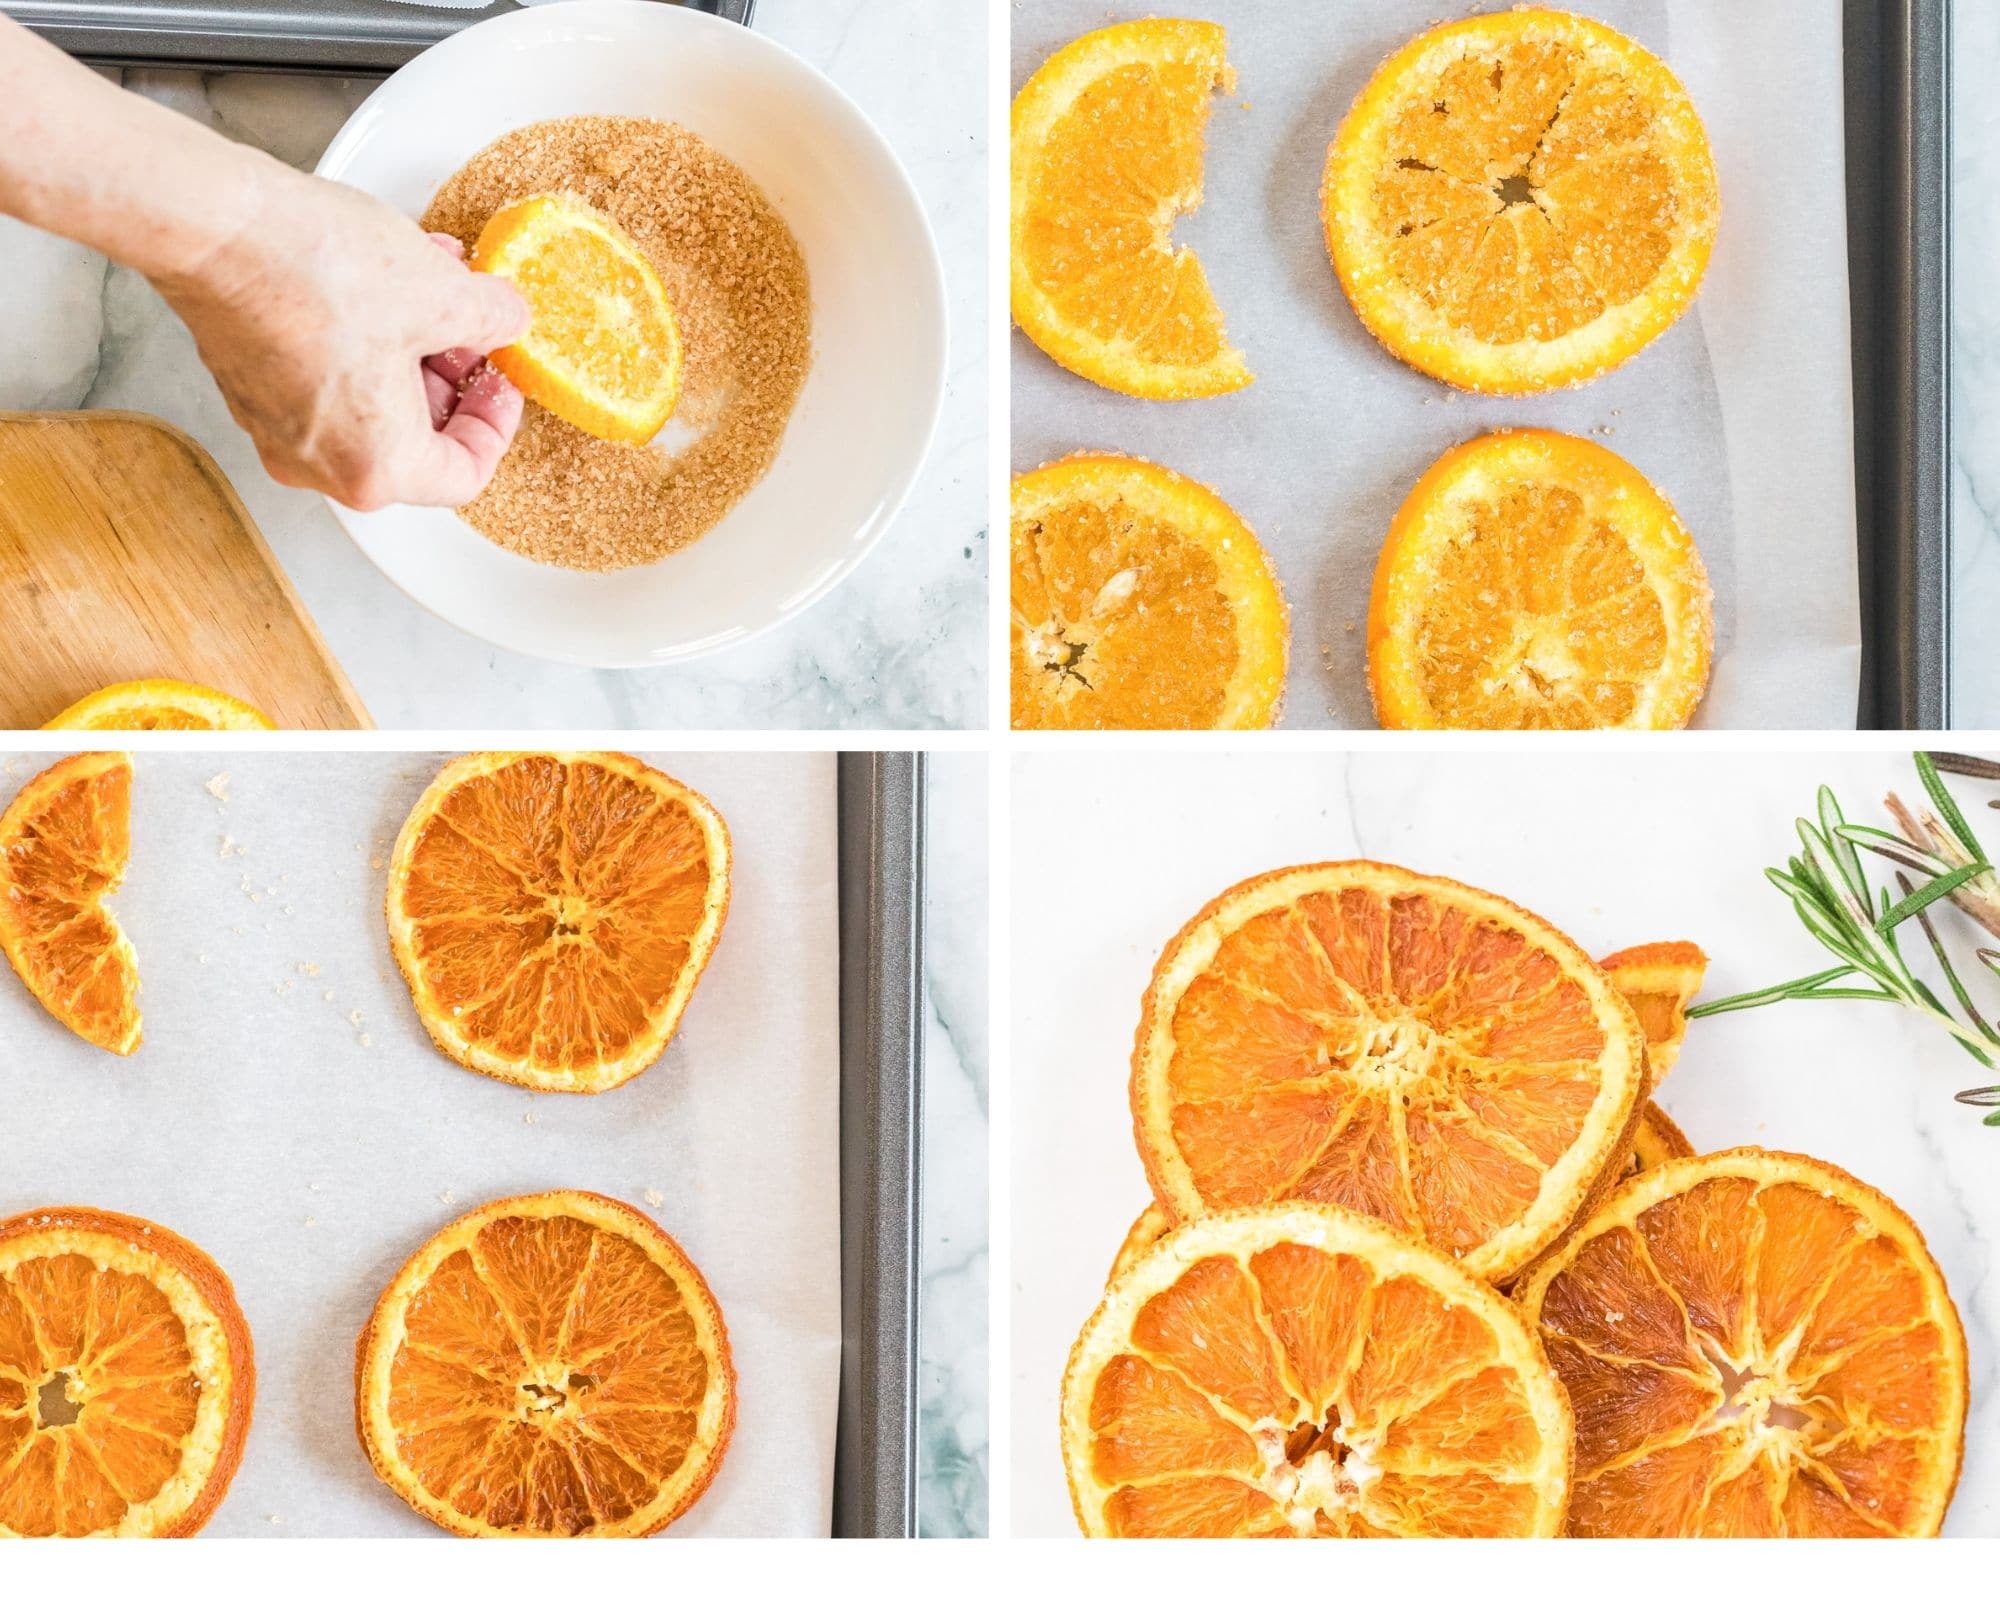
- Place the orange slices on the prepared baking sheet.
- Bake for one hour and a half.
- Turn the slices over and bake for another hour and a half.
- Let the orange slices cool.
- The dried oranges slices are ready to use!
- Store in an airtight container.
What can you do with dried orange slices:
- These orange slices can be used for craft projects in making ornaments, wreaths, or used for potpourris.
- The orange slices can also be used as a garnish for drinks or meats.
- Using string these dried orange slices can be used to embellish wreaths.
- Add a bowl of dried orange slices to a holiday table.
- String the dried orange slices for a pretty garland.
- There are many uses that are creative ways to use these orange slices.

Tips when making dehydrated orange slices:
- Cut the oranges slices as thin as possible, but not so thin they will lose their shape in the oven.
- Store in a cool, dry place or in an airtight container.
Can you eat dried orange slices?
- You probably could since it's all edible ingredients. It might be nice as a garnish for tea.
- I have only used them for crafty type projects, in potpourri, or other ways listed in this post.
How long will dried orange slices last?
- The dried oranges should last 2-3 years.
DIY Recipes:
- Christmas Potpourri
- Maple Pecans
- Honey Roasted Cashews
- Vegan Gingerbread Cookies
- Vegan Sugar Cookies

Dried orange slices are a simple two-ingredient recipe (oranges and sugar) that make a fun and festive garnish, an ingredient for potpourri, garland, and more. You'll love this quick step by step guide to making oven-dried orange slices and it is sure to put you in the holiday mood!
- 4 Oranges (I like to use navel oranges, but you'll need a sturdy orange, not an overly mushy or juicy one for best results.)
- 1/2 cup Sugar (Many sugars will work with this recipe. I prefer coconut sugar, turbinado sugar or regular sugar.)
-
Gather and measure the ingredients.
-
Preheat your oven to 200 degrees F.
-
Slice the oranges into approximately 1/4 inch slices.
-
Toss orange slices in sugar and make sure both sides are coated well. You can use coconut sugar, regular sugar or turbinado sugar.
-
Arrange the orange slices on a parchment-covered baking sheet.
-
Place in oven and bake for one hour and a half hours.
-
After baking for one hour, turn the orange slices over and bake for another hour and a half hours.
-
Check the orange slices and if done - they'll be dry to the touch, they are done. To continue baking, turn the slices over and bake for another half hour or so checking to see if they are dried out as shown in photos.
-
Once done, remove from the oven and cool completely.
-
Store in an airtight container until ready to use.
Notes:
- These orange slices can be used for craft projects in making ornaments, wreaths, or used for potpourris.
- The orange slices can also be used as a garnish for drinks or meats.
- Using string these dried orange slices can be used to embellish wreaths.
- Add a bowl of dried orange slices to a holiday table.
- String the dried orange slices for a pretty garland.
- There are many uses that are creative ways to use these orange slices.
Leave a Reply